1. Technical Specifications
1.1 Function
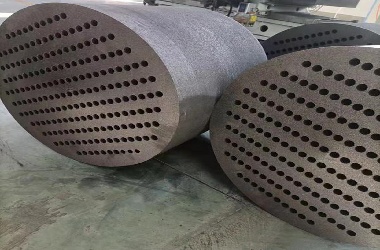
A heat exchanger transfers thermal energy between two media (or two streams of the same medium at different temperatures) through separated tube-side and shell-side channels within a single vessel. This process either cools the hotter medium or heats the colder medium.
1.2 Design Requirements
- Tube-side and shell-side channels are hydraulically isolated and operate under pressure.
- High standards for sealing, structural integrity, and material strength are critical.
1.3 Operational Conditions
Though static, heat exchangers handle high-temperature/pressure media, demanding strict technical controls.
2. Pre-Startup Checks
2.1 Piping Inspection
Ensure inlet/outlet pipes are free of debris (e.g., sand, weld slag).
2.2 Instrumentation Verification
- Confirm proper installation of pressure gauges, thermometers, and safety valves.
- Test for responsiveness and reliability.
2.3 Process Compliance
Validate all connected valves, piping, and supports meet design specifications.
2.4 Mechanical Integrity
- Verify clamping distance between plates matches design.
- Review hydrostatic test and leak-test certifications.
2.5 Ancillary Checks
- Tighten loose bolts and foundation anchors.
- Inspect insulation and anti-corrosion coatings.
2.6 System Purging
Open vent valves to evacuate air from channels.
3. Startup Procedure
3.1 Pre-Startup Coordination
Notify all departments after confirming system readiness.
3.2 Sequential Valve Operation
- Open all outlet valves.
- Gradually open the cold-medium inlet valve to fill the channel (avoid pressure spikes).
- Once stabilized, open the hot-medium inlet valve until both streams reach working pressure/temperature (baseline: 0°C).
3.3 Monitoring
- Avoid abrupt pressure/temperature fluctuations.
- Emergency shutdown if abnormalities occur.
4. Operational Best Practices
4.1 Minor Leakage
- Initial leaks may self-seal within 1–2 hours.
- Persistent leaks: Slightly tighten bolts (never under pressure).
4.2 Pressure Drop Management
- Sudden ΔP surges indicate blockages or fouling.
- Action: Perform backflushing or disassemble headers for cleaning.
4.3 Cross-Contamination
- Immediate shutdown if media mix (detected via composition/pressure shifts), especially for flammable/explosive substances.
4.4 Parameter Limits
- Exceeding temperature/pressure thresholds accelerates gasket degradation and causes leaks.
4.5 Cold Spots
- Check for trapped air if uneven heat distribution occurs.
5. Shutdown Protocol
5.1 Sequential Isolation
- Gradually close hot-medium inlet valve (maintain minimum pressure).
- Close cold-medium inlet valve to equalize pressures.
- Shut outlet valves only after pressure zeroes.
5.2 Winter Precautions
- Drain and purge all media to prevent freeze damage.
6. Troubleshooting Guide
Table 6: Abnormalities and Corrective Actions
| Issue | Solution |
| Temperature Fluctuations | Shutdown if unresponsive to adjustments; inspect for cross-leakage. |
| Pressure Spikes | Emergency stop; diagnose blockages or valve failures. |
| Leaks | Minor: Seal with repair compounds. Severe: Shutdown for gasket replacement. |
| Vibration | Tighten loose bolts; check for flow obstructions or misalignment. |
7. Safety Measures
7.1 Hazard Mitigation
- Wear PPE to prevent burns or toxic exposure during startups/shutdowns.
7.2 Emergency Response
- Follow shutdown protocols for equipment failures or leaks.
7.3 Proactive Maintenance
- Regularly test safety valves and alarms; document inspections.
7.4 Operational Restrictions
- Never adjust bolts under pressure.
7.5 Timely Action
- Address anomalies immediately to prevent escalation.